Perfect Your Dough Kneading Skills for Soft and Fluffy Bread
Essential Ingredients You Need to Create Soft and Delicious Bread
When you set out on your journey to master the art of creating irresistibly soft bread, it’s vital to understand the key ingredients that contribute to its unique structure and flavour: flour, water, Yeast, and salt. Each of these fundamental components plays a significant role in determining the bread’s final quality and texture. The flour serves as the primary ingredient, with its protein content, particularly gluten, being essential for the dough’s elasticity and chewiness. Choosing the right type of flour—be it all-purpose, bread flour, or wholemeal—can greatly influence your bread’s outcome. Water acts as a crucial activator, hydrating the flour, dissolving yeast, and facilitating the fermentation process. Yeast is the fermentation powerhouse, converting sugars into carbon dioxide, which helps the dough rise. Meanwhile, salt enhances flavour and strengthens the gluten structure, resulting in a more robust and flavourful loaf. Gaining mastery over these essential ingredients and understanding their interactions is fundamental for successful kneading and achieving that coveted soft texture.
How to Determine the Perfect Kneading Time for Luxuriously Soft Bread
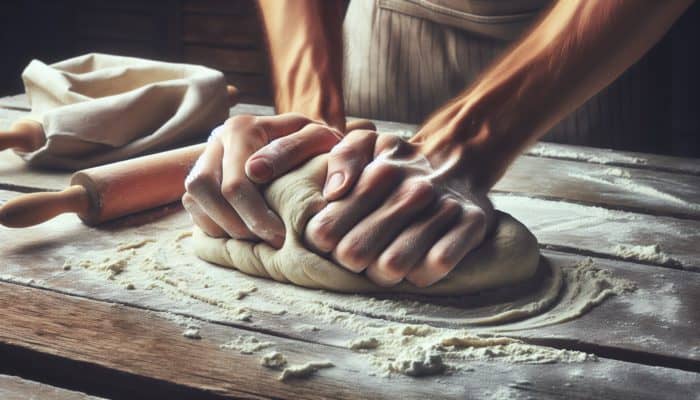
The time required for kneading dough can vary significantly based on several factors, including the specific type of dough and the desired texture of the final bread product. Generally, kneading for approximately 10-15 minutes serves as a dependable guideline for producing soft bread. This duration is essential for effective gluten development, which is critical for achieving a soft and airy crumb. Instead of relying solely on a timer, it’s important to observe the dough’s characteristics throughout the kneading process. In the initial stages, the dough should look rough and shaggy, but as you knead, it will gradually transform into a smooth, elastic form. Key indicators to watch for include a decrease in stickiness and an increase in manageability. By being attuned to your visual and tactile senses—feeling for a slight elasticity and smoothness—you’ll have a much more accurate indication of readiness than simply following a countdown. The ultimate aim is to cultivate the gluten network sufficiently to ensure that the bread rises beautifully, resulting in a delightful texture once baked.
Identifying the Perfect Dough Consistency for Soft Bread
Achieving the ideal dough consistency is paramount to the success of your bread-making adventures. The perfect dough should be smooth and elastic, displaying a slight tackiness that is neither overly sticky nor excessively dry. If the dough becomes too sticky, it can hinder your ability to handle and shape it effectively, while a dry dough may lead to a dense and crumbly loaf. The goal is to create a dough that retains its shape yet remains pliable enough to stretch without tearing. A practical method for evaluating your dough’s consistency is the windowpane test: take a small piece of dough and gently stretch it between your fingers. If it can form a thin, translucent sheet without breaking, your dough has reached the correct consistency. This indicates that sufficient gluten has developed, effectively trapping the gases produced during fermentation, leading to a beautifully soft final product.
Proven Techniques to Enhance Your Dough Kneading Skills
Mastering the Stretch-and-Fold Technique for Superior Dough Kneading
The stretch-and-fold method is an incredibly effective technique for developing gluten while keeping the dough hydrated and airy. This method is particularly beneficial for high-hydration doughs, which can pose challenges when kneading using traditional techniques. To master this technique, follow these detailed steps:
- Start with a lightly floured work surface and place your dough in the centre.
- Gently stretch one side of the dough upwards and fold it over the centre.
- Repeat this stretching and folding technique on each side, working your way around the dough until all four sides have been folded.
- Allow the dough to rest for 20-30 minutes before repeating the stretch-and-fold process.
- Continue this cycle for the desired number of folds (typically 3-4) during the first rise.
- Note how the dough becomes increasingly elastic and smooth with each cycle.
- Finally, let the dough complete its bulk fermentation before shaping and baking it.
This method not only effectively promotes gluten development but also incorporates air into the dough, resulting in a light and airy texture that is simply delightful.
Recognising the Detrimental Effects of Over-Kneading on Bread Quality
Indeed, over-kneading your dough can lead to several problems, including tough and dense bread. Over-kneading occurs when excessive mechanical action breaks down gluten strands rather than allowing them to develop properly. Signs of over-kneaded dough include an overly tight texture that resists stretching and a shiny, almost leathery surface. If you notice these characteristics, restoring its softness may prove challenging. To avoid over-kneading, pay close attention to your dough throughout the kneading process, focusing on its texture instead of strictly adhering to a timer. Remember, the goal is to cultivate a well-developed gluten network that can effectively trap gases without compromising the integrity of the dough itself.
Maximising the Use of a Dough Scraper During Kneading

A dough scraper is an indispensable tool for managing sticky dough and streamlining the kneading process. This simple yet effective instrument enables you to lift, fold, and turn the dough without adding excessive flour, which could lead to a denser loaf. To maximise the benefits of a dough scraper, consider the following tips:
- When the dough clings to your work surface, gently use the scraper to lift it, reducing the need for excess flour.
- Utilise the scraper to divide the dough into manageable sections for shaping and dividing.
- The scraper can assist with folding the dough during the stretch-and-fold method, making air incorporation easier and more efficient.
- After kneading, use the scraper to transfer the dough into a bowl for rising, ensuring it retains its shape.
By incorporating a dough scraper into your kneading routine, you can significantly enhance your control over the dough, ultimately achieving better results with less effort and time.
Expert Insights to Refine Your Dough Kneading Techniques
Insider Tips from Professional Bakers on Effective Kneading Techniques
Professional bakers possess a wealth of knowledge regarding kneading techniques that yield exceptional results. Many recommend employing the autolyse technique, which involves mixing flour and water and allowing it to rest before adding yeast and salt. This method enables the flour to hydrate thoroughly, thereby enhancing gluten development. Moreover, experienced bakers suggest kneading by feel rather than strictly by time, encouraging home bakers to attune themselves to the dough’s texture and elasticity. Real-world examples from bakeries worldwide—from artisanal shops in Paris to rustic bakeries in Tuscany—highlight the importance of patience during kneading, urging bakers to take their time to achieve the perfect dough consistency. By adopting these expert techniques into your practice, you can elevate your bread-making skills, resulting in more consistent and delightful outcomes.
The Crucial Impact of Temperature on the Dough Kneading Process
Temperature plays a vital role in the kneading process, significantly affecting the overall behaviour of the dough. Warmer environments can accelerate fermentation, potentially necessitating shorter kneading times to avoid overdevelopment of gluten. Conversely, cooler temperatures often require extended kneading periods to achieve the desired elasticity. For example, bakers in tropical regions may need to adapt their kneading techniques due to the rapid fermentation caused by higher ambient temperatures. Additionally, the temperature of your ingredients can influence dough performance; warm water can hasten yeast activation, while cooler components can slow it down. Understanding how temperature affects your dough equips you with valuable insights for adjusting your kneading and fermentation practices to achieve optimal outcomes.
Avoiding Common Mistakes When Kneading Dough
Kneading is a skill that requires practice, and being aware of common mistakes can greatly enhance your bread-making results. A frequent error is uneven kneading, where certain areas of the dough receive more attention than others, resulting in an inconsistent texture. To overcome this, focus on working the dough uniformly, ensuring that every part is adequately kneaded. Another common mistake is neglecting essential rest periods. Skipping rest can lead to tough bread, as the gluten won’t have sufficient time to relax. Additionally, failing to adapt kneading techniques to the dough’s hydration level may lead to unmet expectations. Recognising these common pitfalls will empower you to refine your kneading approach, significantly improving the quality of your bread.
How to Identify Properly Kneaded Dough for Successful Baking
Recognising when your dough has been properly kneaded is vital for successful bread-making. Signs of well-kneaded dough include a smooth, elastic texture that springs back when gently pressed. One definitive test is the windowpane test, where a small piece of dough is stretched thinly without tearing. If the dough can stretch to form a translucent sheet, it indicates adequate gluten development. Additionally, properly kneaded dough should feel slightly tacky but not sticky, facilitating easy handling. By paying close attention to these indicators during kneading, you can ensure your dough is ready for the next phase of bread-making.
Essential Tools and Equipment to Enhance Your Dough Kneading
Comparing the Efficiency of Stand Mixers and Hand Kneading
Both stand mixers and hand kneading offer unique advantages, and the choice largely depends on personal preference and the specific requirements of your dough. A stand mixer can save considerable time and effort, kneading dough efficiently with minimal physical strain. This method is particularly beneficial for larger batches or high-hydration doughs that require significant kneading time. However, hand kneading provides a more intimate connection with the dough, delivering tactile feedback that many bakers appreciate. This hands-on approach allows for better adjustments based on the dough’s behaviour. Many bakers advocate for a hybrid approach: using a stand mixer for the initial kneading and finishing by hand to achieve the perfect consistency. Ultimately, the best method is one that aligns with your skill level and baking goals.
Choosing the Perfect Bowl to Enhance Your Kneading Experience
Selecting the appropriate bowl for kneading can significantly improve your bread-making experience. Ideally, a wide, shallow bowl is the best option, as it provides easier access to the dough and better control during kneading. Non-stick or lightly oiled surfaces are recommended to prevent sticking, which can complicate the kneading process. Bowls made from materials such as glass, stainless steel, or ceramic offer durability and ease of cleaning. Furthermore, selecting a bowl that accommodates the dough’s rise is essential; it should be large enough to allow for expansion during fermentation. By opting for the right bowl, you can optimise your kneading technique and create a more enjoyable baking experience.
Finding the Ideal Surface for Kneading Dough
While it is possible to knead dough on various surfaces, certain materials can enhance the process. Marble or granite countertops are particularly ideal due to their smooth surfaces and cool temperatures, which help prevent the dough from overheating during kneading. However, wooden boards can also be effective, providing a natural surface that absorbs some moisture and helps manage stickiness. It is crucial to ensure that the surface is clean and free of debris to maintain the integrity of the dough. The key is to select a stable, non-porous surface that allows for easy manipulation and control of the dough during kneading, ultimately leading to better handling and a superior final product.
Understanding the Science Behind Dough Kneading for Optimal Results
The Critical Role of Gluten Development in Crafting Bread Structure
Gluten development is fundamental to the structure of bread, and understanding its mechanics is crucial for successful baking. When flour combines with water, two proteins—glutenin and gliadin—begin to form gluten. Kneading aligns these proteins into long strands, creating a network that traps gas bubbles released during fermentation. This network imparts elasticity and chewiness to the bread. The more you knead, the more developed the gluten network becomes, leading to a softer, more pliable dough. When adequately developed, gluten forms the framework that supports the dough’s rise, contributing to both the structure and texture of the finished loaf. Understanding the science behind gluten enables bakers to manipulate their techniques to achieve specific outcomes, whether aiming for a soft sandwich loaf or a crusty artisan bread.
The Essential Role of Yeast in the Dough Kneading Process
Yeast is a vital component in the bread-making process, significantly impacting the dough’s behaviour during kneading. As yeast ferments, it consumes sugars, producing carbon dioxide and alcohol that contribute to the dough’s rise and flavour. Proper kneading ensures even distribution of yeast throughout the dough, facilitating consistent fermentation. Additionally, as the dough is kneaded, the gluten structure develops, helping to trap the gases produced by the yeast. An even distribution of yeast results in a uniform rise, enhancing the loaf’s texture consistency throughout. Understanding the role of yeast and its interaction with kneading techniques empowers bakers to create visually appealing and deliciously flavorful loaves.
The Influence of Kneading on Dough Texture and Quality
Kneading significantly influences the final texture of the dough, affecting everything from crumb structure to overall softness. During kneading, gluten strands develop and align, forming a network that captures the gases produced during fermentation. This network is crucial for achieving a light and airy crumb in the finished bread. The degree of kneading directly relates to the dough’s strength and elasticity, determining how well it rises and how soft it becomes. Insufficient kneading can lead to dense, heavy bread, while over-kneading may result in a tough texture. Therefore, mastering the kneading technique is essential for achieving a desirable final product, whether for a crusty sourdough or a soft sandwich loaf.
Essential Tips for Perfecting Your Dough Kneading Technique
Recognising the Signs of Properly Kneaded Dough for Better Baking
Identifying the signs of properly kneaded dough is crucial for successful bread-making. Key indicators include a smooth, elastic texture and the ability to pass the windowpane test. Here are some signs to observe:
- The dough feels smooth and pliable, free from sticky patches that could hinder handling.
- It springs back when poked gently, indicating good elasticity and structure.
- The surface appears slightly shiny, reflecting proper hydration and gluten development.
- It can stretch thinly without tearing, successfully passing the windowpane test.
These characteristics signify that the dough has reached the ideal state for fermentation and baking. By honing your ability to recognise these signs, you can significantly improve your bread’s texture and achieve consistently delightful results.
The Vital Importance of Rest Periods During Kneading
Incorporating rest periods during kneading is vital for optimal gluten development and overall texture. Allowing the dough to rest briefly facilitates gluten relaxation, reducing the effort required in subsequent kneading sessions. This relaxation phase can help prevent overworking the dough, which may lead to toughness. Typically, a 20-30 minute rest period after a series of kneading can enhance the dough’s extensibility. During this time, the gluten aligns and develops more uniformly, resulting in a softer final loaf. Integrating rest periods into your kneading routine can significantly improve the quality of your bread, making your baking experience more enjoyable and rewarding.
Exploring Advanced Kneading Techniques for Enthusiasts
For those eager to refine their kneading skills, several advanced techniques can enhance dough development. The slap-and-fold method is a dynamic technique in which the dough is slapped onto the work surface and then folded over itself. This method effectively develops gluten while incorporating air into the dough, contributing to a lighter texture. Another technique is coil folding, where the dough is lifted and coiled back on itself during bulk fermentation. This gentle approach strengthens gluten while maintaining the dough’s airy quality. Experimenting with these advanced techniques can yield unique textures and flavours in your bread, allowing you to tailor your methods to suit various recipes.
Effective Strategies for Perfecting Your Dough Kneading Skills
Best Practices for Successful Dough Kneading
Implementing effective kneading practices can significantly improve your bread-making results. Firstly, maintain a consistent rhythm; knead the dough with uniform pressure, allowing it to stretch and fold evenly. Secondly, incorporate rest periods as necessary, enabling the gluten to relax and making it easier to work with the dough. Additionally, refrain from adding excessive flour during kneading; instead, utilise a dough scraper to manage stickiness while keeping the dough hydrated. Finally, remain attuned to the dough’s behaviour—observe its texture, elasticity, and responsiveness to inform your kneading process. By following these actionable steps, you can ensure your kneading technique yields a soft, desirable loaf of bread.
Tailoring Kneading Techniques to Suit Various Dough Types
Different dough types require tailored kneading techniques, as variations in hydration and ingredients affect the approach. For instance, high-hydration doughs, such as those used for ciabatta or focaccia, may benefit from the stretch-and-fold method rather than traditional kneading, which facilitates gluten development without overworking the dough. Conversely, richer doughs containing fats or sugars may require more kneading time to develop a strong gluten network, as these components can hinder gluten formation. Understanding the specific needs of your dough will empower you to adjust your kneading method effectively, ensuring optimal results for various bread recipes.
The Numerous Advantages of Proper Kneading in Bread-Making
Proper kneading offers numerous benefits that enhance the overall quality of your bread. Firstly, it fosters a robust gluten structure, essential for trapping gases during fermentation and creating a light, airy crumb. Additionally, well-kneaded dough yields a uniform texture, ensuring even distribution of ingredients and flavours throughout the bread. A strong gluten network also contributes to the bread’s structural integrity, allowing it to rise effectively without collapsing during baking. Ultimately, mastering the kneading process is key to producing consistently delicious bread that is not only visually appealing but also delights the palate with every bite.
Determining the Optimal Kneading Time for Luxuriously Soft Bread
The kneading duration for soft bread typically ranges from 10 to 15 minutes, but this can vary based on factors such as dough hydration and the type of flour used. It’s imperative to focus on the dough’s texture rather than strictly adhering to a timer; the objective is to achieve a smooth, elastic consistency that springs back when pressed. Pay attention to the dough’s behaviour during kneading. If it becomes overly sticky, you may need to adjust your technique or take a brief rest to allow the gluten to relax. Ultimately, understanding your dough will help you determine the optimal kneading time to achieve the perfect soft bread.
Essential Tools to Enhance Your Kneading Experience
Utilising the right tools can streamline the kneading process and improve your results. A dough hook attachment for a stand mixer is invaluable for those who prefer a less physical approach, allowing for efficient kneading while minimising strain on your hands. In addition, a dough scraper is essential for managing sticky dough and keeping your work surface tidy. A high-quality bench knife can also be beneficial for cutting and shaping dough efficiently. Moreover, investing in a quality mixing bowl with a non-stick surface can facilitate easier kneading and handling. By equipping yourself with these tools, you can enhance your kneading technique and achieve more consistent results in your bread-making endeavors.
Troubleshooting Common Dough Kneading Challenges
Identifying and Solving Issues with Excessively Sticky Dough
Excessively sticky dough can arise from several factors, most commonly excessive water content or inadequate kneading. When too much water is added, the dough can become overly hydrated, making it difficult to handle. To rectify this issue, you can either reduce the water in your recipe or knead the dough longer to adequately develop the gluten structure. If the dough remains sticky, consider using a dough scraper to manage it without adding excessive flour, which may lead to a denser final product. Adjusting your hydration levels and kneading technique will significantly improve your dough’s consistency and workability.
Steps for Salvaging Over-Kneaded Dough to Restore Its Quality
Over-kneaded dough can be salvaged, although it may require some patience. If you suspect your dough has been over-kneaded, allow it to rest for 20-30 minutes. This resting period will enable the gluten to relax, making the dough easier to shape. After resting, gently shape it without applying excessive strain, and then proceed with your recipe. While the final loaf may not achieve the same lightness as properly kneaded dough, this approach can help mitigate the effects of over-kneading, yielding a satisfactory result that you can still enjoy.
What to Do When Your Dough Tears During Kneading
If your dough tears during kneading, it may indicate either over-kneading or insufficient resting time. When dough tears, it can signal that the gluten has developed too tightly or that the dough hasn’t had adequate time to relax. In this case, allow the dough to rest for 10-15 minutes before continuing. This resting period will help the gluten relax, enabling gentler handling. During subsequent kneading, exercise caution and apply less force to prevent further tearing. Modifying your technique based on the dough’s response will lead to better outcomes in your future baking sessions.
Frequently Asked Questions About Dough Kneading Techniques
What type of flour is best for creating soft bread?
For soft bread, using bread flour or all-purpose flour with a higher protein content is ideal, as it promotes gluten development and yields a light, fluffy texture.
How can I ensure my bread is fluffier and lighter?
To achieve fluffier bread, ensure proper kneading to develop gluten and consider incorporating moisture-enhancing ingredients, such as milk or yogurt.
What are the consequences of insufficient kneading on bread texture?
Insufficient kneading results in a weak gluten structure, leading to dense, poorly risen bread with a heavy texture and lacking the desired lightness.
Can I effectively knead dough using a food processor?
Yes, a food processor can effectively knead dough; however, be cautious of over-kneading, as this can easily result in tough dough.
How do I incorporate nuts or seeds into my dough without affecting its structure?
Introduce nuts or seeds during the last few minutes of kneading to ensure even distribution without compromising gluten development.
What steps should I take if my dough fails to rise during fermentation?
If your dough does not rise, verify the yeast’s freshness and ensure it was kept in a warm, draft-free environment for effective fermentation.
Is it necessary to use a scale for accurately measuring baking ingredients?
Using a scale to measure ingredients ensures accuracy, leading to more consistent results in your bread-making endeavors.
Can I freeze my dough before baking it, and how?
Yes, dough can be frozen before baking. Ensure it is adequately wrapped to prevent freezer burn, and allow ample time to thaw and rise before baking.
What is the purpose of adding sugar to bread dough?
Sugar enhances flavour, aids in browning during baking, and serves as food for yeast, promoting fermentation for a better rise.
How do I achieve a crispy crust on my bread?
To attain a crispy crust, bake the bread in a preheated oven and consider adding steam during the initial minutes of baking.
Connect with us on Facebook for the latest updates!
The post How to Knead Dough for Soft Bread: Master the Art appeared first on https://cookinggods.com
The Article Knead Dough for Soft Bread: A Mastery Guide Was Found On https://limitsofstrategy.com
References:
https://cityaccommodations.com.au/knead-dough-for-soft-bread-your-essential-mastery-guide/